This document provides instructions on how to install and configure the Mail Validator PHP script. The script is designed to validate email addresses and uses various APIs and services. The configuration for these services and other site settings are managed through the site-config.php file.
Configuration File (site-config.php)
The site-config.php file contains essential configuration settings for the Mail Validator script. You can find this file in the includes folder. Below is a breakdown of each variable in the file and instructions on how to modify them.
Site Path and URL
This variable defines the absolute path to the script on your server and the domain you wish to use the script on.
Example:
$sitepath = "/path/to/mail-validator";
$domainURL = 'https://yourdomain.com';
Google AdSense
$adsenseID: If you want to display Google AdSense ads, provide your AdSense Publisher ID here.
Google reCAPTCHA Keys
To begin, you need a Google account. If you don’t have one, create it at Google Accounts.
Visit the
Google reCAPTCHA website and click on the “Admin Console” button, usually located in the top right corner. You'll be prompted to sign in with your Google account if you haven't already.
Once in the Admin Console, you'll see an option to register a new site. Click on “+” or “Register a new site.”
Step 4: Choose reCAPTCHA Type: reCAPTCHA v2: This version asks users to complete a challenge, like identifying objects in images and select "I'm not a robot" tickbox.
Add your website's domain (e.g., example.com). This is to ensure that the reCAPTCHA key is only used for your website. Accept the reCAPTCHA Terms of Service. Optionally, you can choose to receive alerts about your reCAPTCHA service (recommended).
$recaptcha_site_key and $recaptcha_secret_key: These are your site's keys for Google reCAPTCHA. Add them to your site-config.php file with your own keys obtained from Google.
Stripe Payments
If you don't already have a Stripe account, you need to create one. Go to the
Stripe website and sign up for an account. Follow the registration process, which includes providing your email, creating a password, and then filling in details about your business.
Once your account is set up and you've logged in, you will be taken to the Stripe Dashboard. This is the central place where you can manage your Stripe account, view transactions, manage payments, etc. In the Stripe Dashboard, navigate to the "Developers" section. You can find this in the sidebar menu or sometimes at the top of the dashboard.
Under the "Developers" section, click on "API keys." Here you will find your API keys.
There are two types of keys: Publishable Key and Secret Key. The publishable key is used in front-end (client-side) requests, while the secret key is used for server-side requests.
$stripe_key: This is your secret API key for Stripe. It is used for processing payments.
$stripe_key = "your-stripe-secret-key";
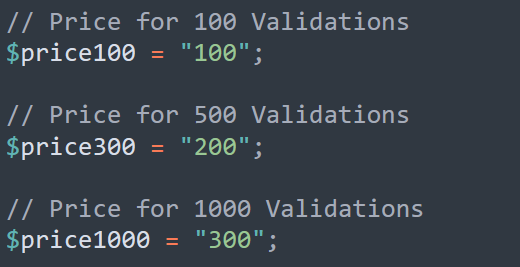
Pricing for Email Validations
You can set your own prices for how much bulk validations will cost.
$price100, $price300, $price1000: These variables define the prices for 100, 300, and 1000 email validations, respectively. Prices should be in cents.
Understanding the Tokens File Format
In your tokens.txt file, each line represents a token and its associated value or usage limit. The format appears to be token,limit, where:
- token: This is a unique identifier or code that represents the token.
- limit: This is an integer that represents the limit or value associated with the token, such as the number of validations or uses that the token allows.
Valid Tokens: A standard entry for a valid token looks like token500,500. In this example, token500 is the token, and 500 is the limit or number of uses assigned to it.
Commented Tokens: Lines beginning with # are treated as comments. For example, #token2,500 is a commented line and is typically ignored by the script. This can be used to deactivate tokens without deleting them. Once a token is fully used the script will automatically add a # to deactivate the token.
How Tokens are Used
When a user inputs a token into your system, the system checks this tokens.txt file to find a matching token. If a match is found, the system then checks the associated limit. For example, if the token is token11 with a limit of 1, the system allows whatever service or validation the token is meant to permit once.
After a token is used, the system may decrement the limit in the file, indicating that one use has been consumed. For a token with a limit of 1, this means it can't be used again.
Managing Tokens
Adding Tokens: To add a new token, simply add a new line with the token and its limit. For example, adding newtoken,100 allows newtoken to be used 100 times.
Removing Tokens: To remove a token, delete its line from the file, or comment it out by adding # at the beginning of the line.
Modifying Tokens: To change a token's limit, edit the number after the comma. Be cautious when increasing limits on existing tokens to avoid unauthorized excess usage.
Bulk Email Checker API Key
This is the API key for Bulk Email Checker, a service used for email validation. You can sign up for a free account
here. Once signed up you can purchase a token pack of validations. 1000 validations can be purchased for $2.95.
Upload Files: Upload the script files to your web server.
Configure site-config.php: Modify the site-config.php file with your specific configuration settings as described above.
Test the Script: Access the script via your web browser to ensure that it is correctly configured and functioning.
Setting Up Cron Jobs
Once logged into cPanel, scroll down to the “Advanced” section, or use the search bar to find the “Cron Jobs” tool.
Click on “Cron Jobs” to open the cron job management area.
Set up a New Cron Job
In the Cron Jobs section, you’ll find an area to add a new cron job.
Adding the Cron Job for Deleting Old Files
Common Settings: Select a common setting if applicable (e.g., “Once a day” for a daily task). Alternatively, set the time and frequency manually. For daily execution at 1 AM, set Minute to 0, Hour to 1, and leave Day, Month, and Weekday as *.
Command: Enter the command to run your script. It should look like this:
/usr/bin/php -q /home/www/example.com/includes/delete_old_files.php
Repeat the same steps for the processing script. If it needs to run every hour, set Minute to 0 and leave the rest as *.
Command:
/usr/bin/php -q /home/www/example.com/process.php
This simple guide should assist you in setting up the necessary cron jobs for your Mail Validator script. Regularly monitor your cron jobs and logs to ensure they are executing as expected.
Unix/Linux File Permissions
No Permissions for Others: To maintain security, other users (group and others) should not have any permissions on this file. This prevents unauthorized reading or altering of the token data and config file.
Setting Permissions: A common and secure permission setting for such a file is 600 (read and write permissions for the owner only). You can set this using the chmod command or by modifying the permissions of these files in the file manager.
The two files that need permission changes to 600:
- site-congif.php
- tokens.txt
Troubleshooting
If you encounter issues, check your server logs for errors.
Ensure that all API keys and URLs are correctly entered and valid.


